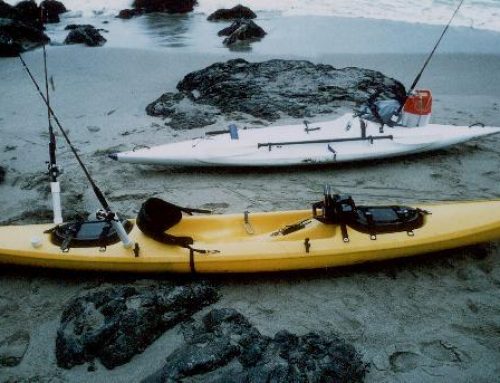
In response to the many inquiries about fishfinder installation I decided to document the installation of my unit on my Scupper Pro and publish it here for all to see.
Finder and battery selection
I am not endorsing any specific finder! As matter of fact, I don’t know JACK S#*$ about how they work or which is better than the other. I will, however, tell you why I chose the particular finder and battery that I did. I bought the Humminbird 200 DX. I based my fishfinder decision on three simple points:
- Price.
- Power requirements. Only 250 mA.
- I think the yellow accents look good with my blue Scupper Pro!
The battery I used is the Yuasa NP7-12. It is a 12 volt battery with 7 Amp hours of power. I am sure they are available at most any electronics store. I based my battery choice on two simple points:
- Size / weight. It fits inside the hull easily and weighs about 5 ¾ lbs.
- The guy at the electronics shop said it would run my unit for about 28 hours! I know it’s overkill but what the heck.
- Don’t forget to buy a charger when you get your battery.
Read this before you start!
This is usually where the manufacturers tell you about the things that can go wrong and how you may possibly injure yourself or your family if you don’t follow directions. I only have on thing to say: “It is EASY!” If it seems to be difficult, then you are doing it wrong. I finished this install in twenty minutes with nothing more than a screwdriver, a box wrench, and a cheapo cordless drill that was having problems with the trigger.
Start here
OK, I lied. There is another element that I took into consideration as I looked at the different brands. This unit has a “shoot through the hull” transducer. That means that it can be mounted inside the hull and it will take reading through the hull. No holes to cut! By the way, less (holes) is more (better).
The “Puck”
The first thing that I did was I located where I wanted to install the transducer and I installed it. I positioned it inside the hull directly below where to compass mounts. Why? It seemed like a good place (no rocket science here) and the cables would reach the place I had in mind for the finder unit. The installation was simple:
- Rough the inside of the hull with 80-grit sandpaper.
- Goop a load of 3M marine adhesive sealant / Fast Cure 4200 in to the center of the roughed spot. Be sure to make the puddle of adhesive about ½ inch larger than the transducer unit and also make sure that there aren’t any air bubbles in the mix.
- Push the transducer “puck” into the blob of glue with a slight twisting motion to squish out any possible air bubbles. Too easy, isn’t it? You may want to set something heavy on top of the whole thing until the glue is completely cured. Mine cured in about 24 hours.
A note on adhesives: Although the manufacturer recommends a 2-part epoxy to mount the transducer, I chose to go with the fast curing polyurethane instead. It seems to be a little more flexible, easier to use and not as messy as the epoxy. As far as performance, I have been getting clean readings down to 350 feet.
The Battery
Since you did such a fine job installing the transducer, it sure would be a shame if your battery got loose in heavy seas and bashed it and the cables to oblivion. My battery weighs 5 ¾ lbs. And if you think the outside of a plastic Ocean Kayak is slick, you should see the inside. I made a cradle / holder out of some plastic foam that I received as shipping material with my computer. It is pretty solid stuff and it won’t soak up water. It is similar to the foam that they make Boogie boards out of. This part is easy too.
- Cut a box or brackets out of the foam to fit your battery.
- Find a convenient place within the hull to hold the battery. Depending on the weight of your particular battery, you may want to improve the balance of your kayak with the placement. I just tried to get it right at the center point. It is almost under my butt.
- Rough up the area with the 80 grit sandpaper. (No, not your butt!)
- I tried the silicon glue for this part but it didn’t stick to the foam so I opted for the spray-on contact cement. 3M makes some good stuff. Spray it on both the roughed up area inside the hull and on the bottom of your battery box. Wait till both sides are almost dry and then carefully attach it to the hull. I say carefully because once this stuff is down, it is down for good.
- Lastly, set the battery in place and use one of those tiny bungee cords to secure it.
The Fishfinder
There are a variety of mounting products that are suitable for kayaks. (edit-The Johnny Bar) Another option is the various mounts that are at all the marine hardware stores. Whatever your choice, place the fishfinder screen in a place where it will be visible, secure, and out of the way. I chose to mount mine directly to the forward hatch without any after market mounting devices. It is out of the way. It is visible. It is a lot cheaper to replace a screwed up hatch than to replace a screwed up hull! Mine comes off very easily and by putting the stainless bolts back through the holes and bolting them down, the hatch is watertight. So far my access to the hatch has been fine but I haven’t hauled in any giant threshers or anything.
The only thing left to do is to attach the cables as shown in the instruction booklet that came with your fishfinder. I didn’t bother making holes for the cables to run through. The seals on the Scupper Pro are loose enough to allow the cables to pass without much leakage at all.


